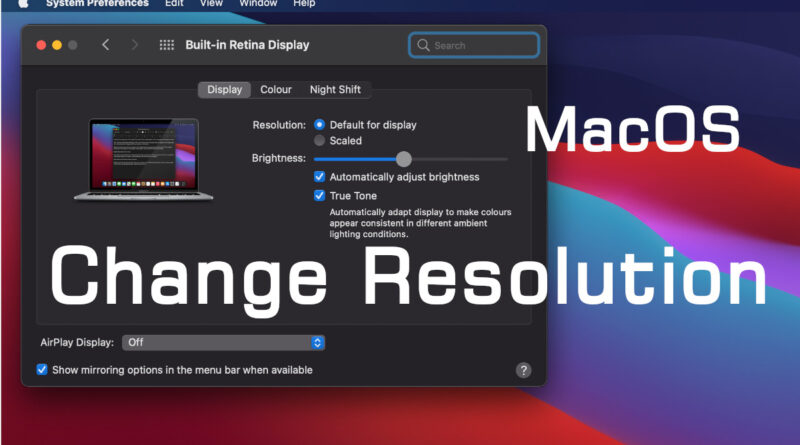
All Apple’s Laptops and Desktops run on MacOS operating system. Let us know how to change screen resolution in MacBook Air, MacBook Pro and iMac devices.
The arranging of dots horizontally and vertically in rows and columns is called Resolution. Each DOT can be displayed using a fixed number of pixels. A pixel represents a single illuminating point (a Tricolor LED maybe). High-end devices may use more pixels to represent a single dot.
How to Change Screen Resolution in MacBook and iMac step by step
Screen Resolution makes a big difference in soothing eye fatigue. The default screen resolution of your MacBook or iMac is sufficient for most users. Still, some users want to accommodate more information or less information on the screen. If you are such a user, you can change the screen resolution step by step as shown below.
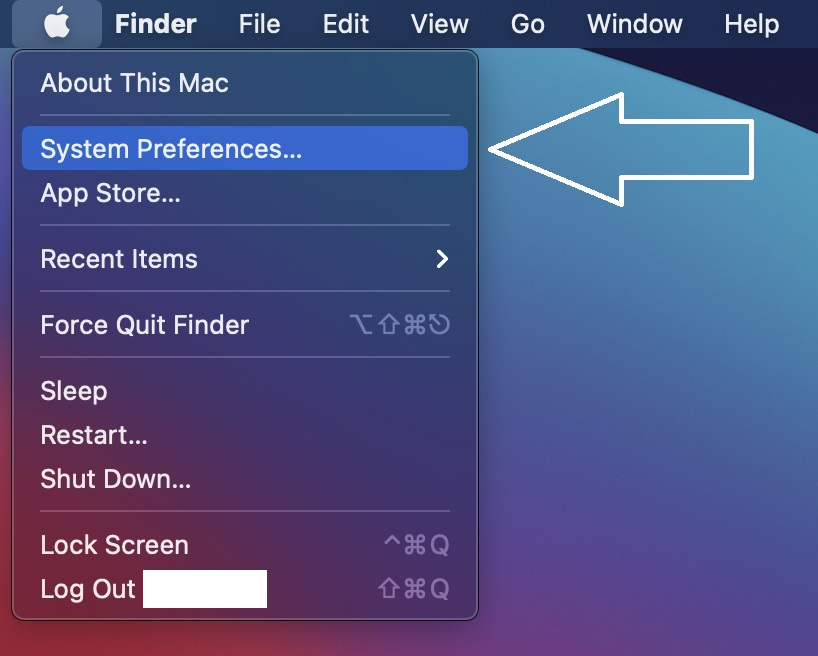
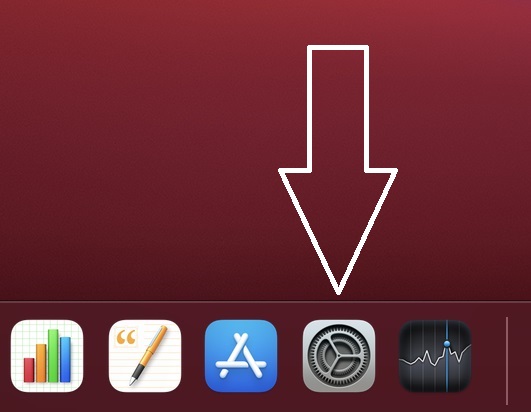
Step 1: Open System Preferences either from APPLE Menu Bar or Dock Bar as shown in the screenshot.
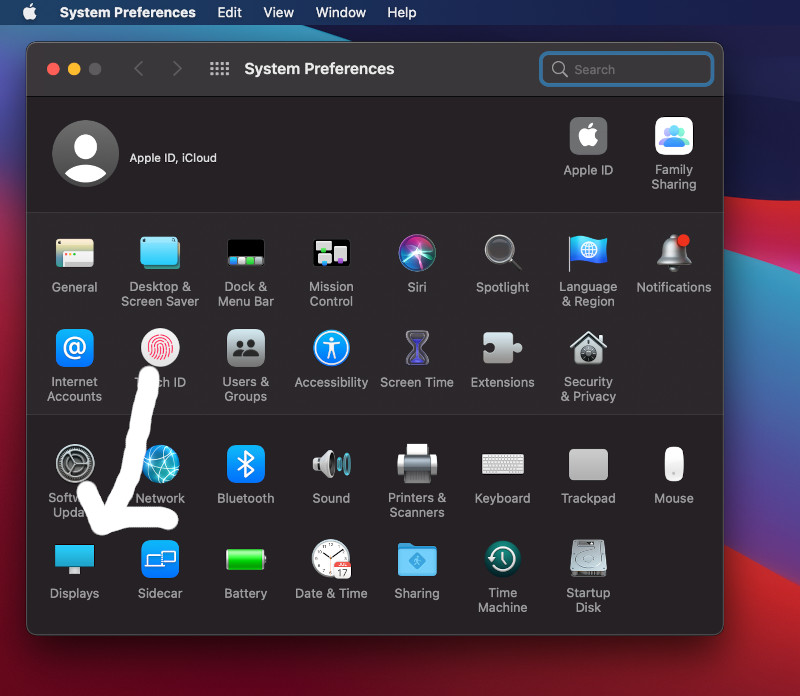
Step 2: System Preferences in MacOS is comparable to a Control Panel in Windows machine. It contains options change all settings of the computer. Click on the “Displays” option.
Step3: By default, macOS chooses the best built-in retina display option for your MacBook. So, the option “Default for display” will be selected. Change it to “Scaled” to see options for choosing various Resolutions or display modes. Choose one of the Four modes available to suit your convenience. The word “Scaling” is used here instead of “Resolution“.
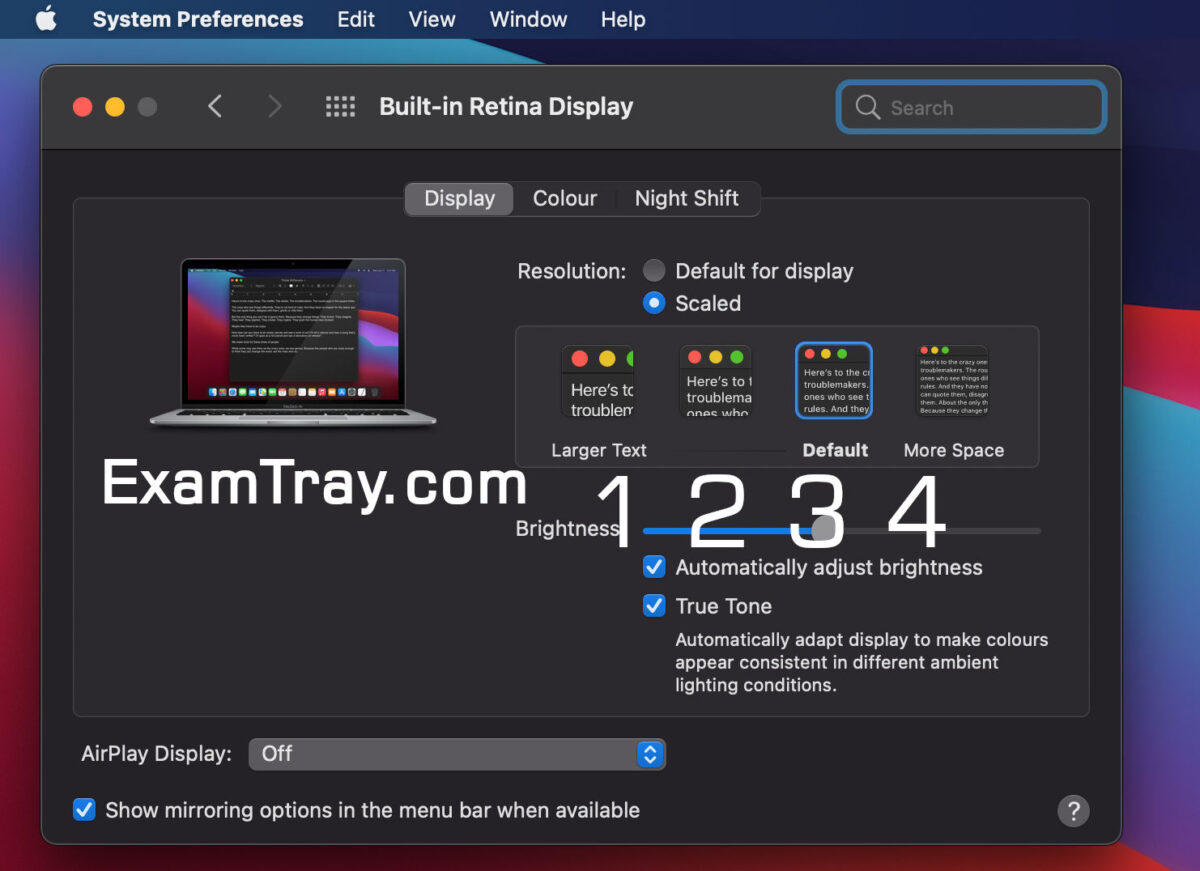
This is how you can change the screen resolution of your MacBook Air, MacBook Pro and iMac devices.
Remember that as long as the text is crisp and easy to read, do not change the resolution. Working at higher resolutions increases fatigue in your eyes. Similarly, working at very low resolutions is also not good for the eyes if the number of pixels representing a DOT is less.
Other Interesting Articles
It is time to Share this article to encourage authors.
